Wizardry Variants Daphne – Trade Waterway (6th District, Warehouse District / Arena, Lounge) Guide

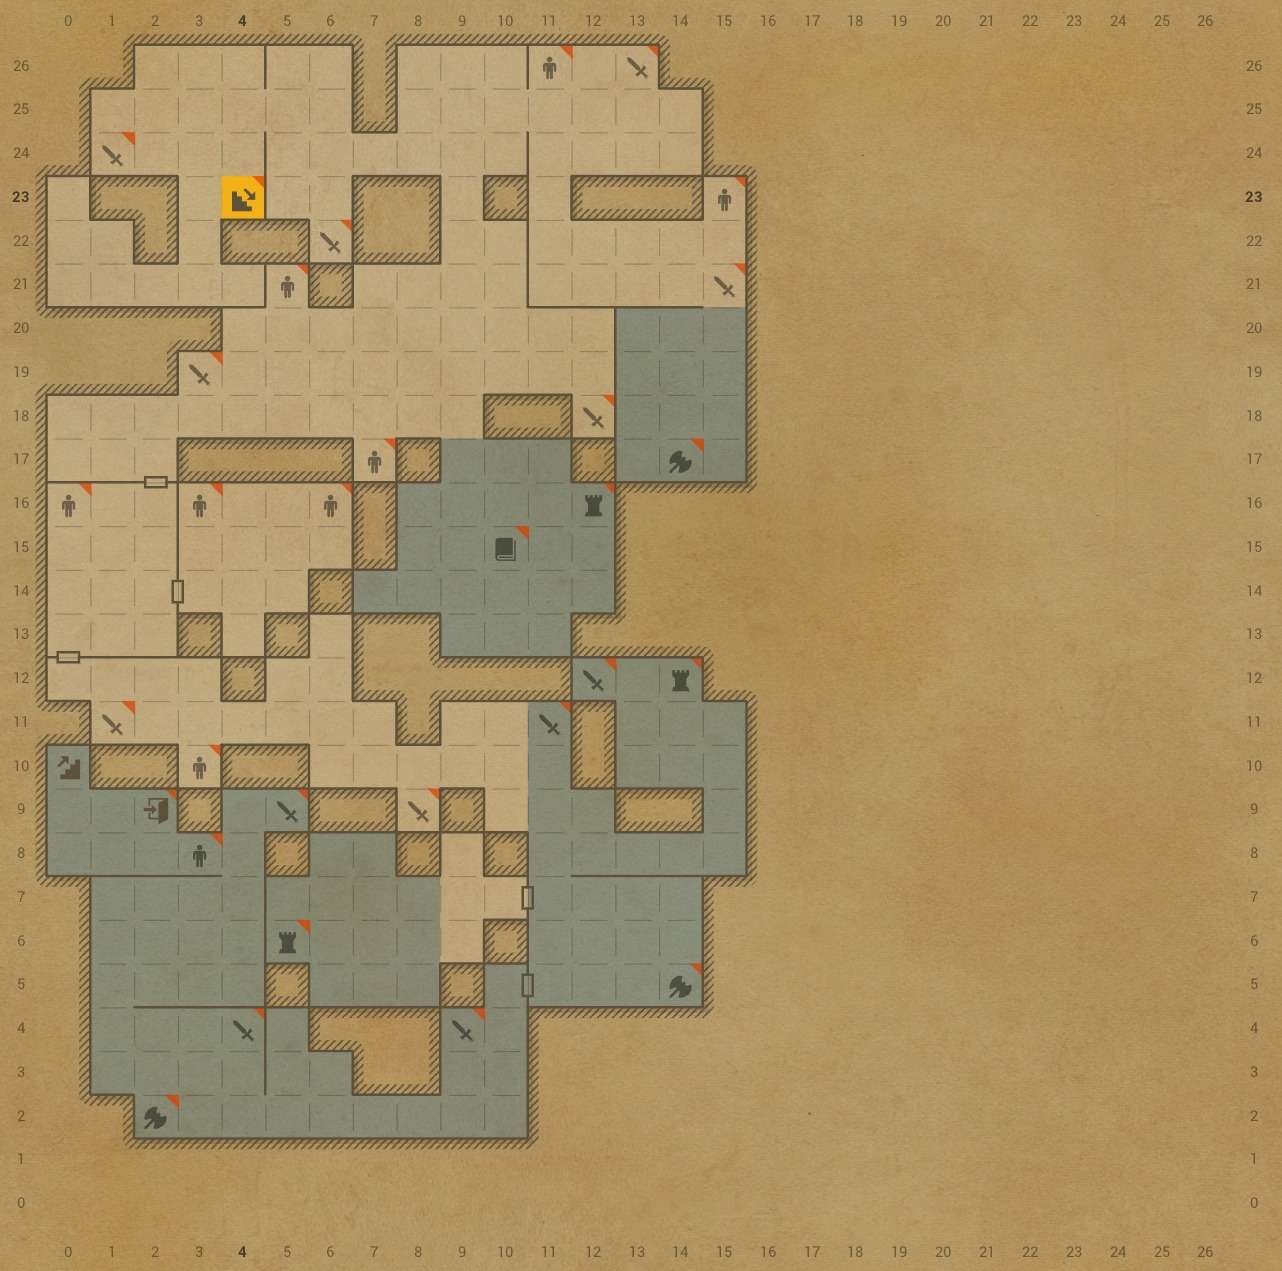
Trade Waterway (6th District, Warehouse District) Guide
Ву kae.
I recently completed this map for the first time with some difficulties (especially with the flooding), so hopefully this map helps you navigate through the floods better and manage your resources without having to make several trips back.
Key Locations
Key locations in order of importance (x, y):
- (3, 6): There’s a flooding mechanism here that is absolutely necessary to activate for the fixed encounter at (3, 3). The flooding recedes until you encounter the boss.
- (7, 4): There’s a Mask of the Water God you can obtain which improves accuracy, evasion, and action speed when fighting in flooded areas. Could be helpful, but I never had the chance to use it for this district.
- (3, 3): There’s an annoying boss, Oar Collector here. If you activated the flooding mechanism at (3, 6), you have exactly 3 turns before the flooding returns. Delay action debuffs work surprisingly well against Oar Collector. It also is weak against rocks, so scrolls of gravel/rockfall are effective also. Ideally you should end the encounter within 4 turns, or the boss will end your run.
Tips
Tips on navigating the floods:
- Do as little encounters as possible after you reach the Well of Life at (7, 2). Personally, I was in danger of ruining my run despite a level 35+ party. (Partially also due to the fact that there were so many Lizardman Champions in my runs, that until now I still can’t comprehend).
- Baiting mobs out of floods works, until it doesn’t.
- Hugging walls is somewhat viable (Unless you’re like me, and all flooding areas have 4 consecutive mobs waiting) Make a run out of the flood unless you plan on backtracking.
- You have about 15 seconds before the area starts flooding again (or 1 battle, if you make an encounter while in a flood).
- All encounters are mobile, except for the fixed boss encounter. And they respawn if you spend too long in the map (needs confirmation).
Bring lots of scrolls and potions. All the best!
The Map
- There is actually flooding in the area near the key.
- There’s a [Gem Icon] corpse after you accept the “Two-Headed Serpents” quest, which also spawns 1 extra mob.
Click to enlarge…
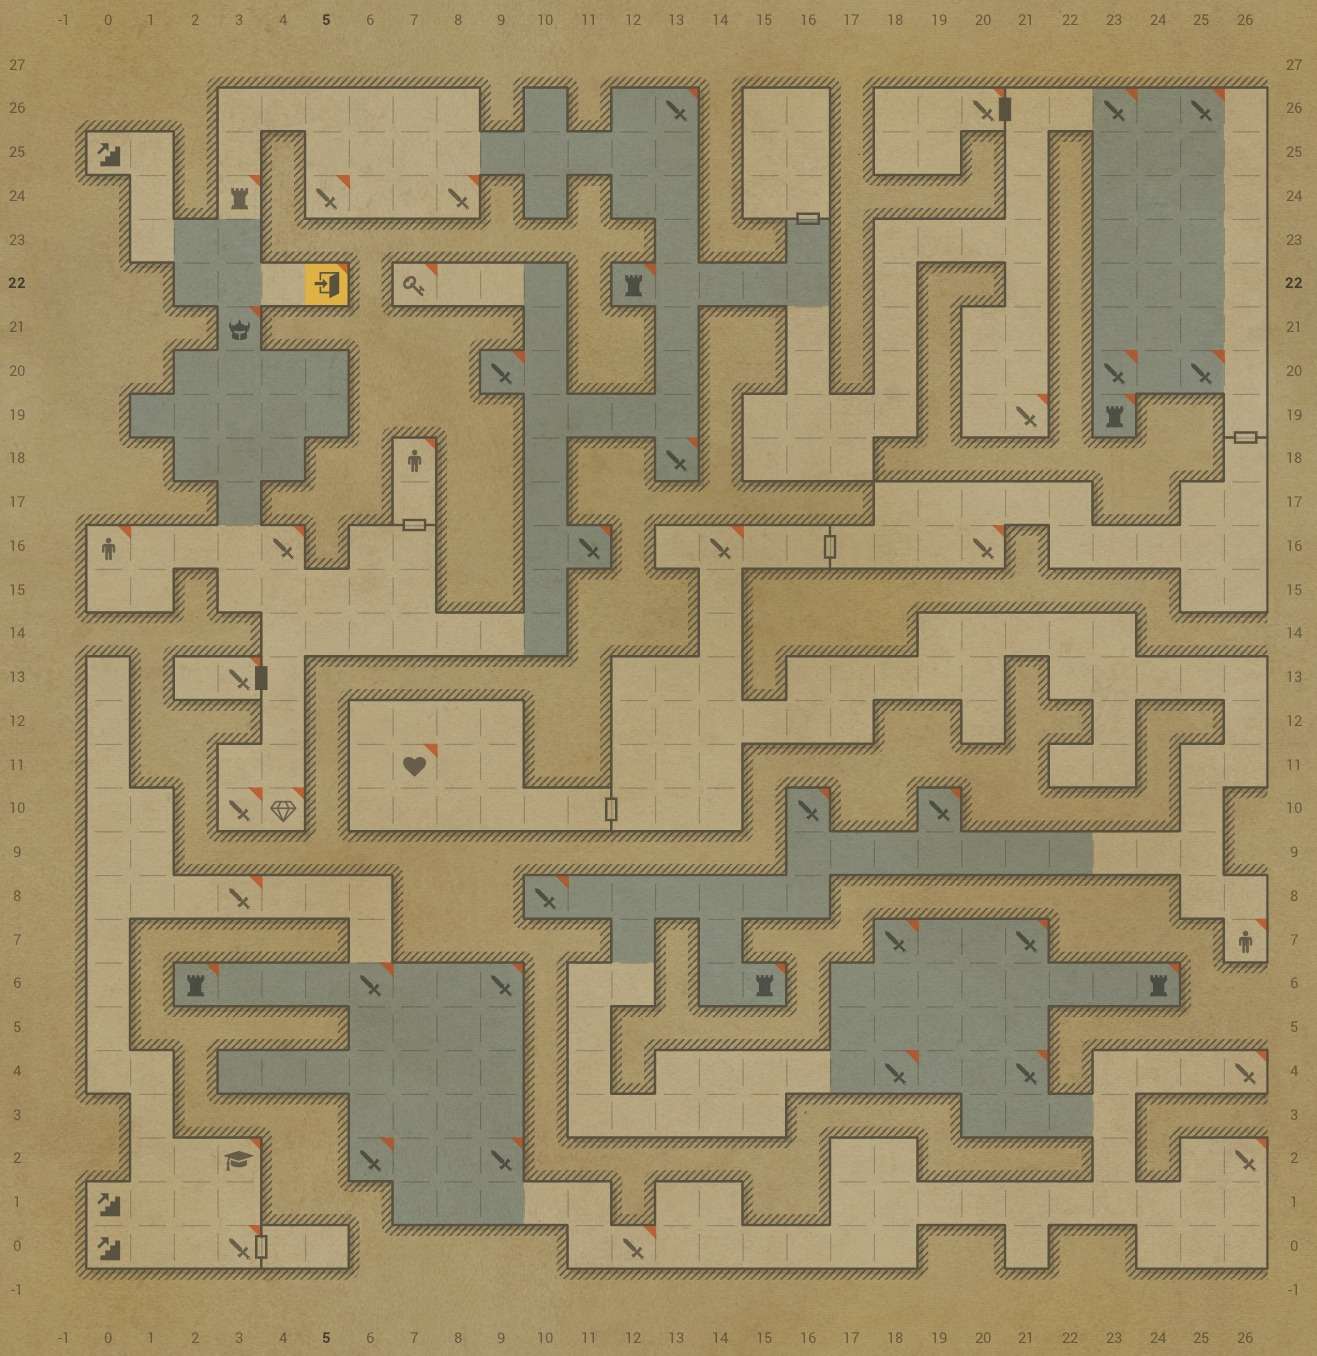
Trade Waterway (Arena, Lounge) Guide
Ву kae.
Arena in particular has some pretty annoying mechanisms that requires some backtracking, but is relatively less painful than Warehouse District.
As usual, the enemy locations are located with [Crossed Swords], and they are all mobile enemies, so you may encounter them at locations not too far from where I’ve marked. I’ve encountered mobs with 4 Succubus and 3 Lizardman Champions + 2 Archers + 1 Mage here, so be sure to stock up on Potions and Scroll of Sedation before you enter!
Key Mechanisms
- All Flood Control Mechanisms have temporary effects, meaning either 15 seconds or 1 battle before the area starts to flood again.
- The Flood Control Mechanism at (12, 16) controls both the flooding in its area and the one at the top-right. It will be useful fighting the Large, Obstinate Man later on without expanding more resources than normal.
- The Flood Control Mechanism at (5, 6) controls both the flooding in its room and the one beneath it.
- The Head Cook at (6, 16) can heal your team. Sahagin Acqua Pazza recovers HP, MP and SP. Salmon-Like Carpaccio recovers HP and SP. Cheese and Bunny Frittata recovers HP and MP. You have to pay 750 golds though.
The Map
To progress the map:
- Talk to the NPC (I didn’t get his name) at (3, 8).
- Fight the Cocky Sahaguin at (2, 2), Sea Ruffian at (14, 5), and Large, Obstinate Man at (14, 17). You can make multiple trips, so do Harken yourself back if you’re low on resources.
- All 3 fights are significantly easier than the rest of the encounters you’ll face.
Click to enlarge…