Black Beacon – Beginners Tips & FAQ
New Players Guide
Ву DoeL.
Reroll Tips
Let’s start with the Gacha Type, Rate, and Pity:
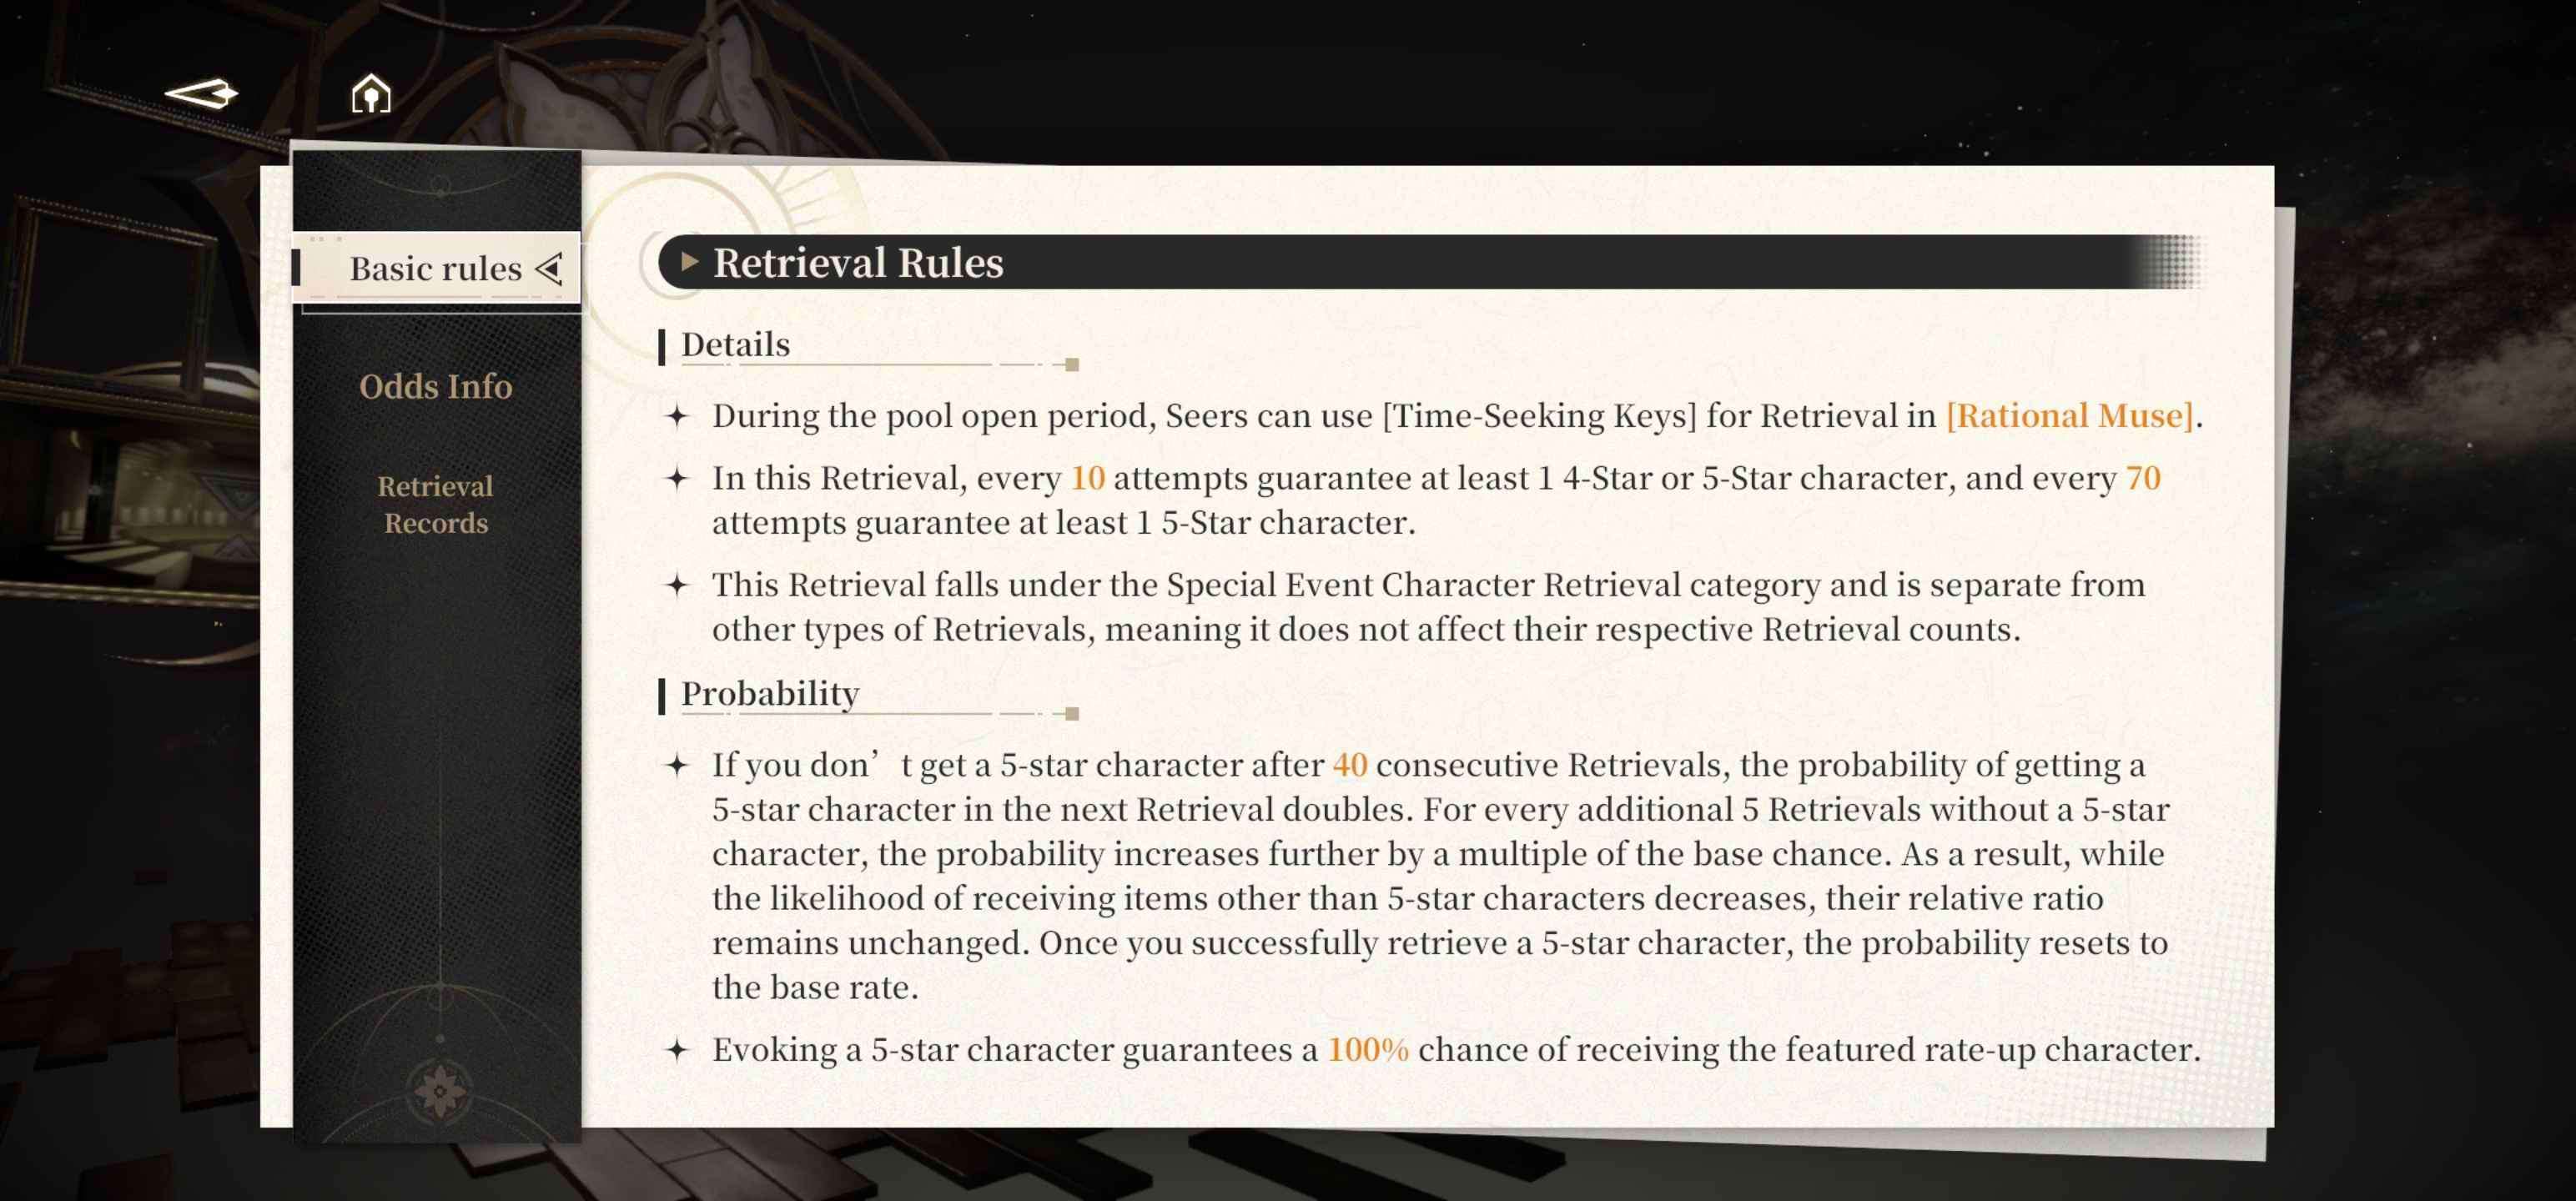
- Standard Banner: pure RNG when you get a 5-star, pity at 70, selector pity at 300.
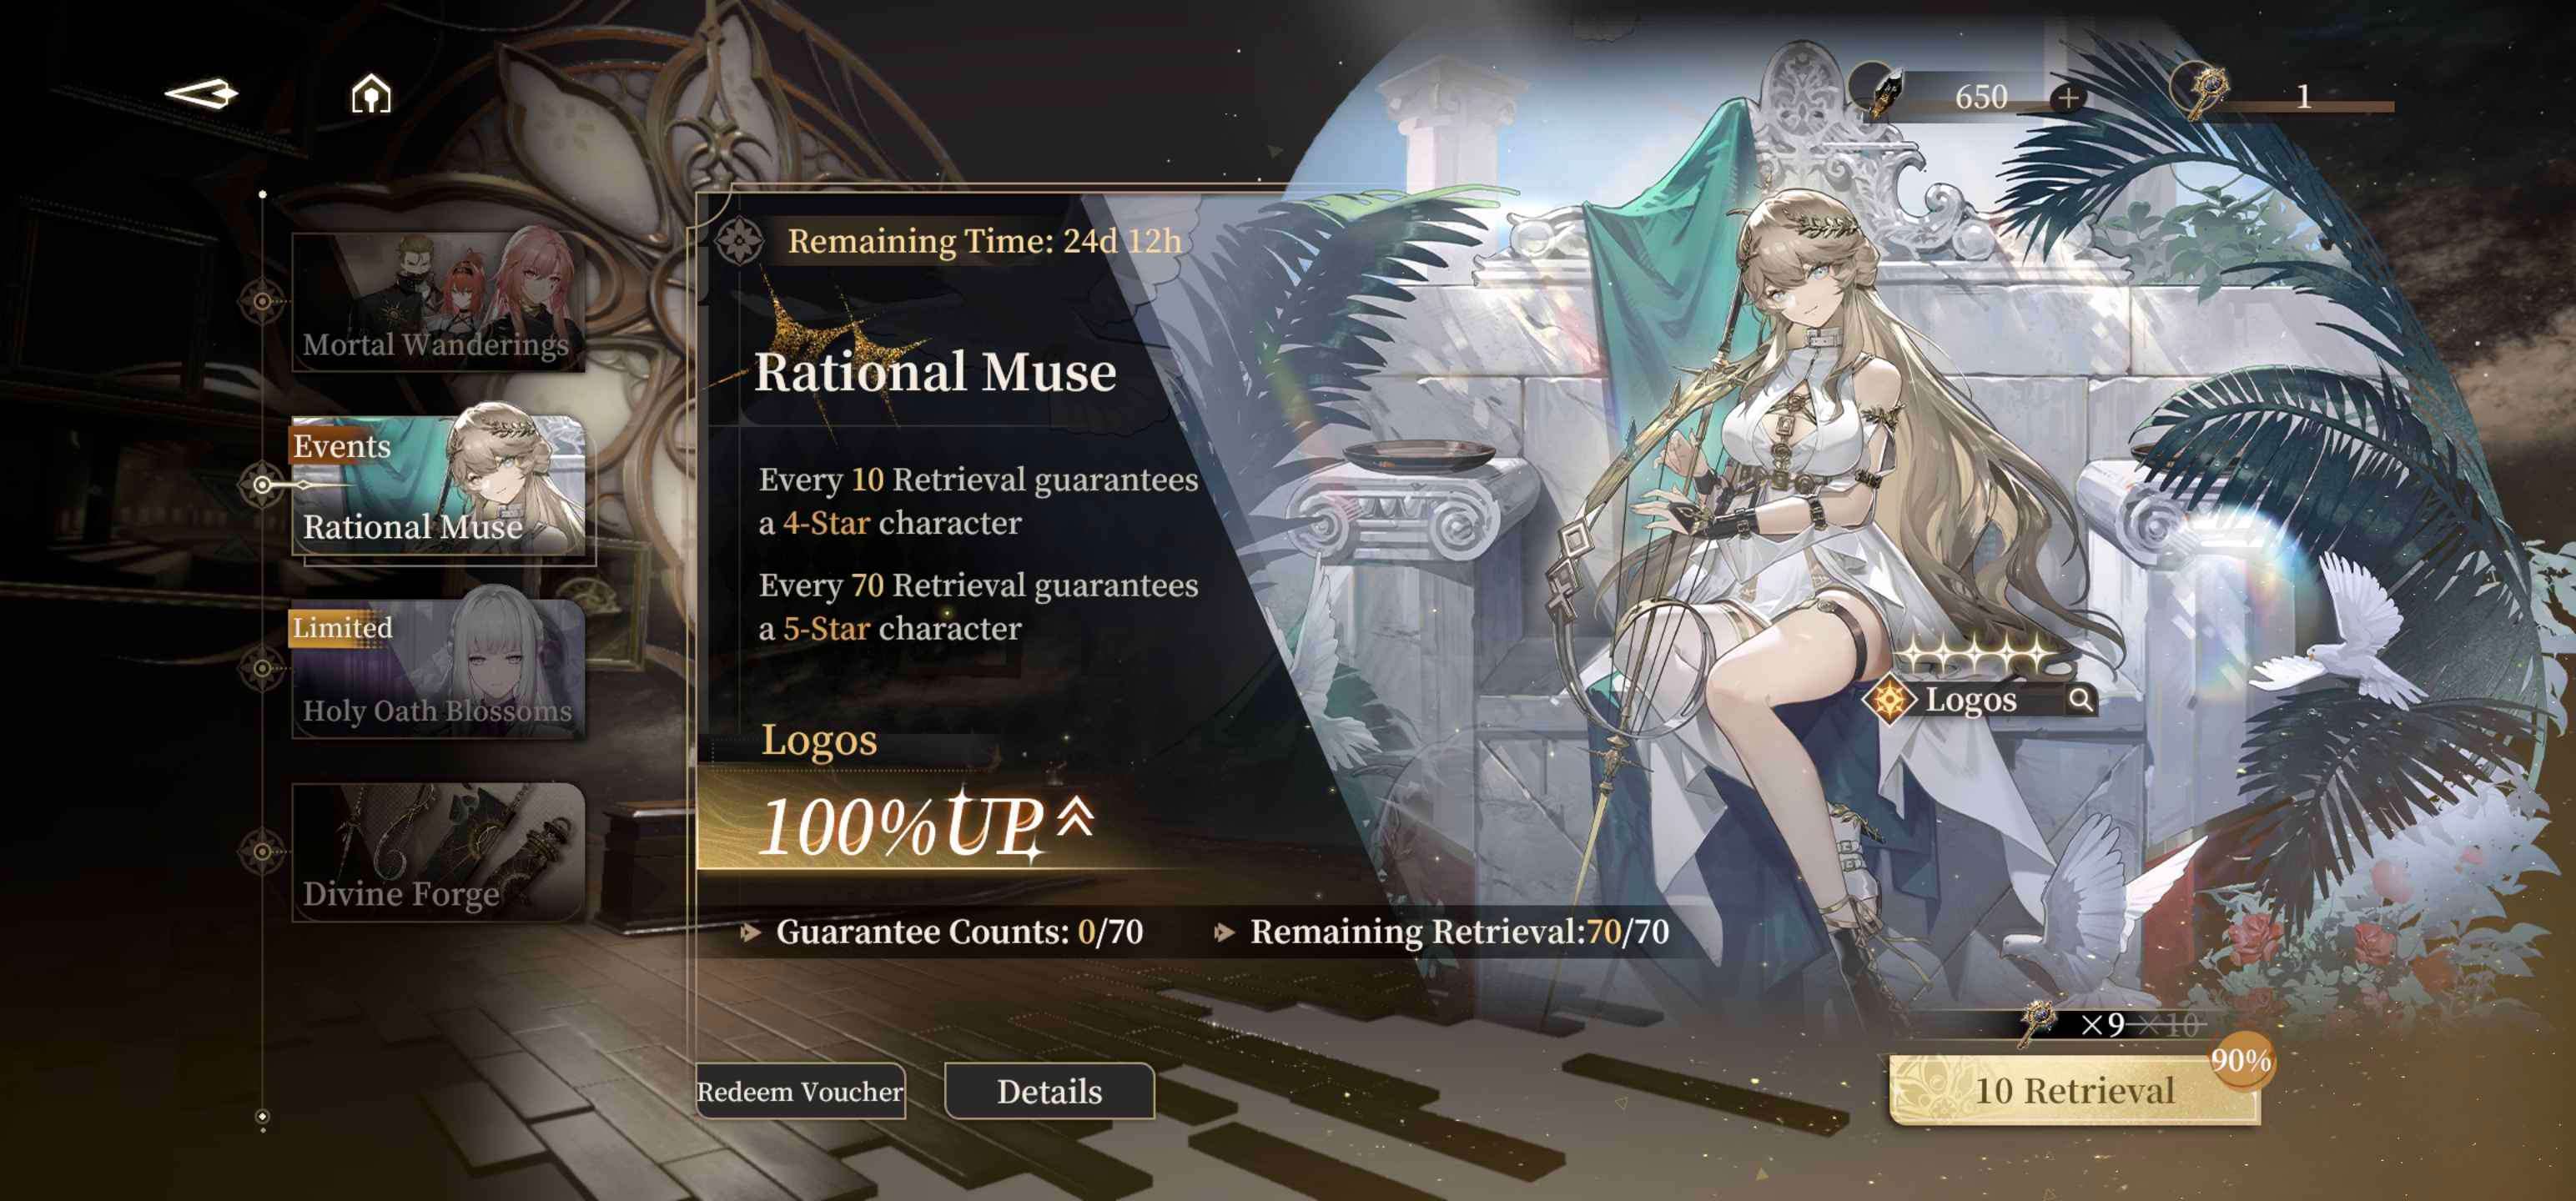
- Event Rate Up: 100% rate-up character with a 70-pull limit (70 is also the pity).
- Limited Weapon Rate Up: 100% with 50 pity, rate increase after the 25th pull (pity shares across the same type of banner).
- Limited Character Rate Up: 70/30 with 70 pity, rate increase after the 40th pull (pity shared across the same type of banner).
- Weapon Banner: 100% with 50 pity.
If you get a 5-star, the pity resets on any banner.
While I would say “no, it’s not necessary” because it is not necessary, you can still do it, which might take 10-15 minutes.
Your reroll target will be either Florence on the Limited Banner or waiting for the Qing banner to appear next week. Alternatively, you can use the Event Banner where you can pick any 5-star from the Standard Pool as the rate-up target.
For the Florence and Qing banners, it will be a 70/30 rate of them appearing when you get a 5-star. While on the Event Rate Up banner, it is 100% guaranteed to be the character you select. However, it has a pull limit of 70, after which the banner will be gone.
But the great thing is, the banner won’t disappear even if you get a 5-star before the 70th pull, and at the 70th pull, you will be guaranteed that character you picked.
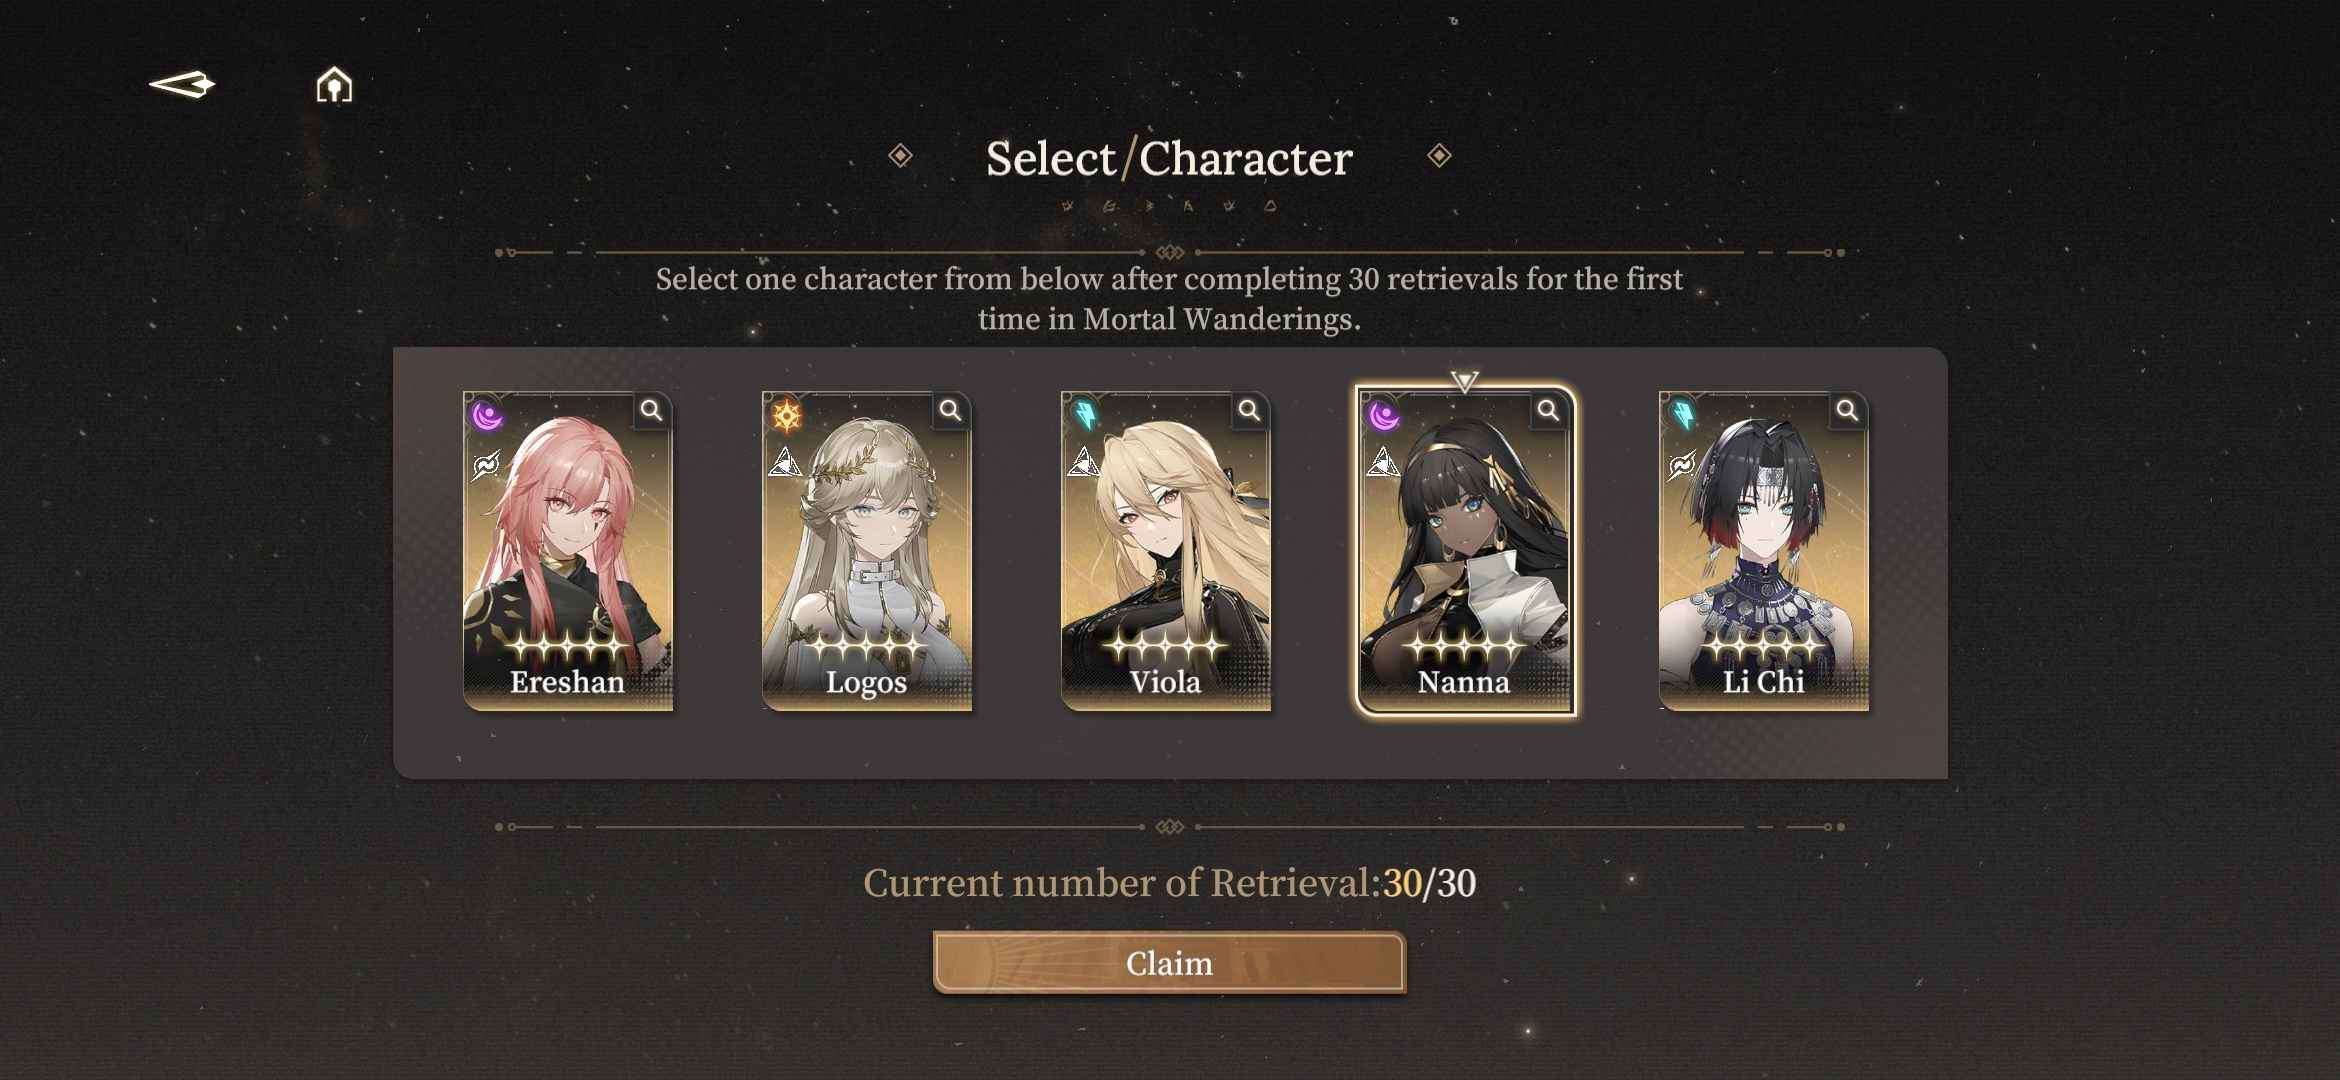
Who to Pick on Beginner Selector?
I personally recommend Li Chi, the reason being you will need him for endgame content. And you will have a hard time getting him if you don’t pick him here.
Why not the others?
Okay, if you are into waifu gaming, you can pick the rest of the female units on the selector.
- Ereshan & Nanna: I don’t recommend picking them for a couple of reasons. First, due to the nature of the Dark element, which requires you to deal big damage in the shortest amount of time to make use of its full potential. Ereshan is a great DPS, but she needs setup which takes time and her exclusive weapon to maximize her output. Nanna’s damage isn’t really the biggest, but she is certainly flashy and quick, and she doesn’t really benefit the team in any significant way.
- Viola: She suffers the same issue as Nanna; she offers almost no benefit to the team when compared with other Balanced-type units like Ming or Logos. However, she is definitely good for crowd control and triggering other characters’ skills/passives that require multiple hits.
- Logos: Just pull on her banner; don’t pick her here.
Rune Shard Tips
Should I spend Rune Shard (premium currency) to buy Stamina?
If you want to use it for gacha, then don’t. But let’s say you do reroll, or you already have a great pull and got your desired characters early. Then, I would say you can. The price for stamina in Black Beacon is on the cheaper side compared to other similar gacha games. However, you can just consider this as an option.
The stamina you can buy daily is 10 times. The prices will be as follows: 40-40-60-60-60-60-60-60-60-60.
You can opt for just buying the first two because they are cheaper.
Early Release Game Plan
How about an early release game plan?
Okay, so this one is pretty easy, but we will advance more later. The game plan is to maximize stamina usage by following the 7-Day event requirements. There will be event missions that you need to follow, so first, spend your stamina to follow those missions. Don’t use free stamina recharge from the event until later, once all missions are unlocked.
Important Things to Do and Avoid
- Don’t farm Skill level mats until you unlock the highest skill level mats dungeon.
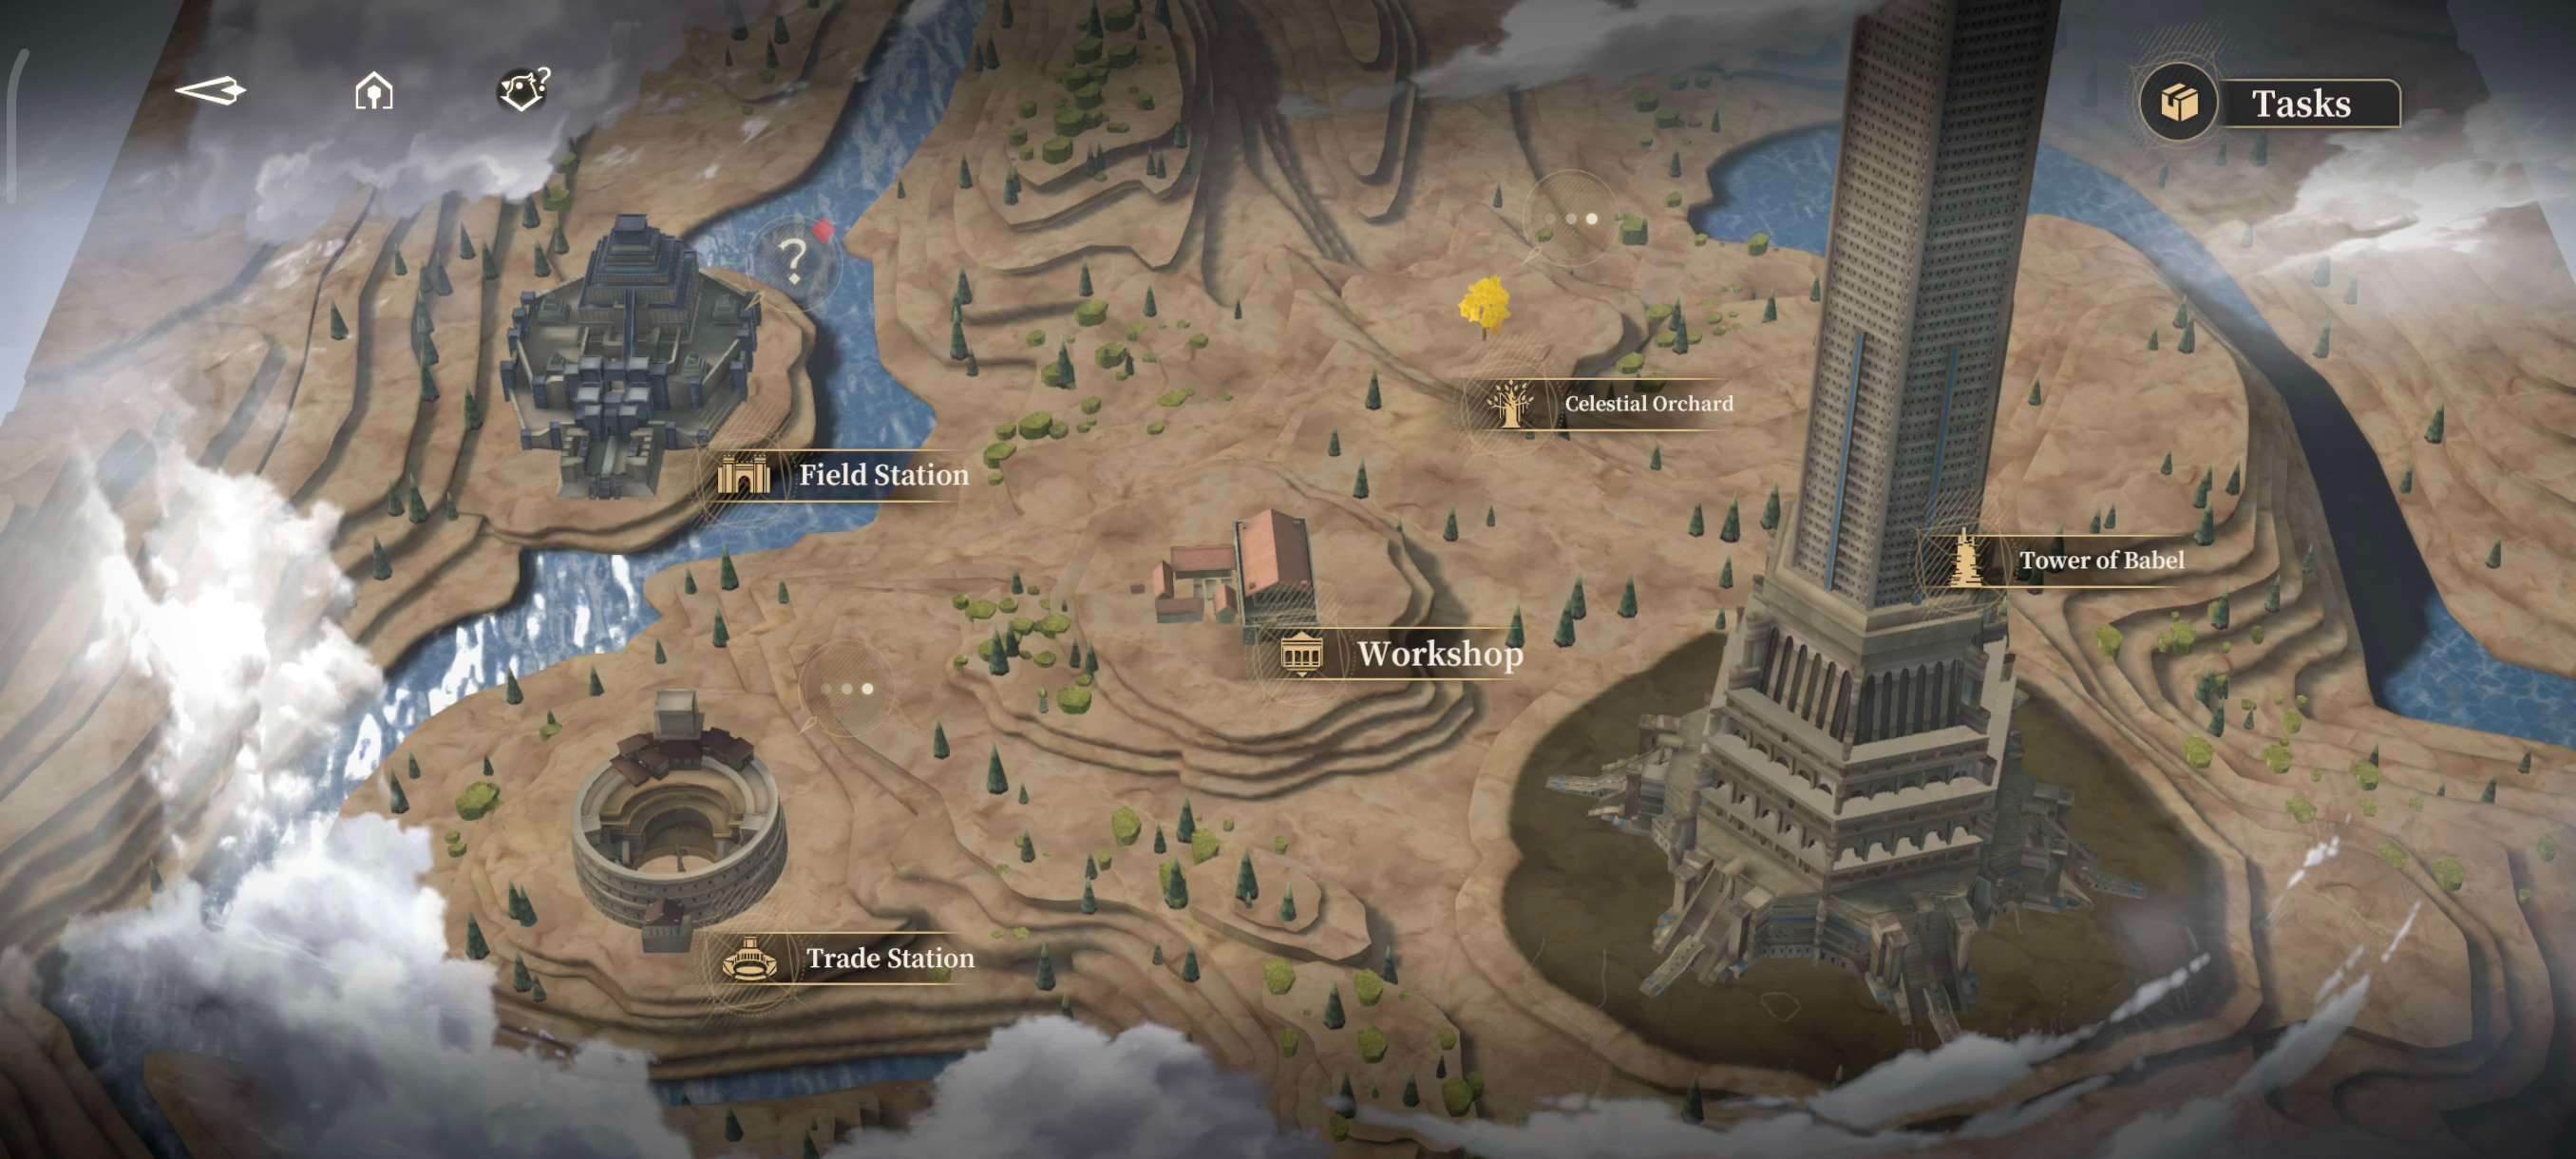
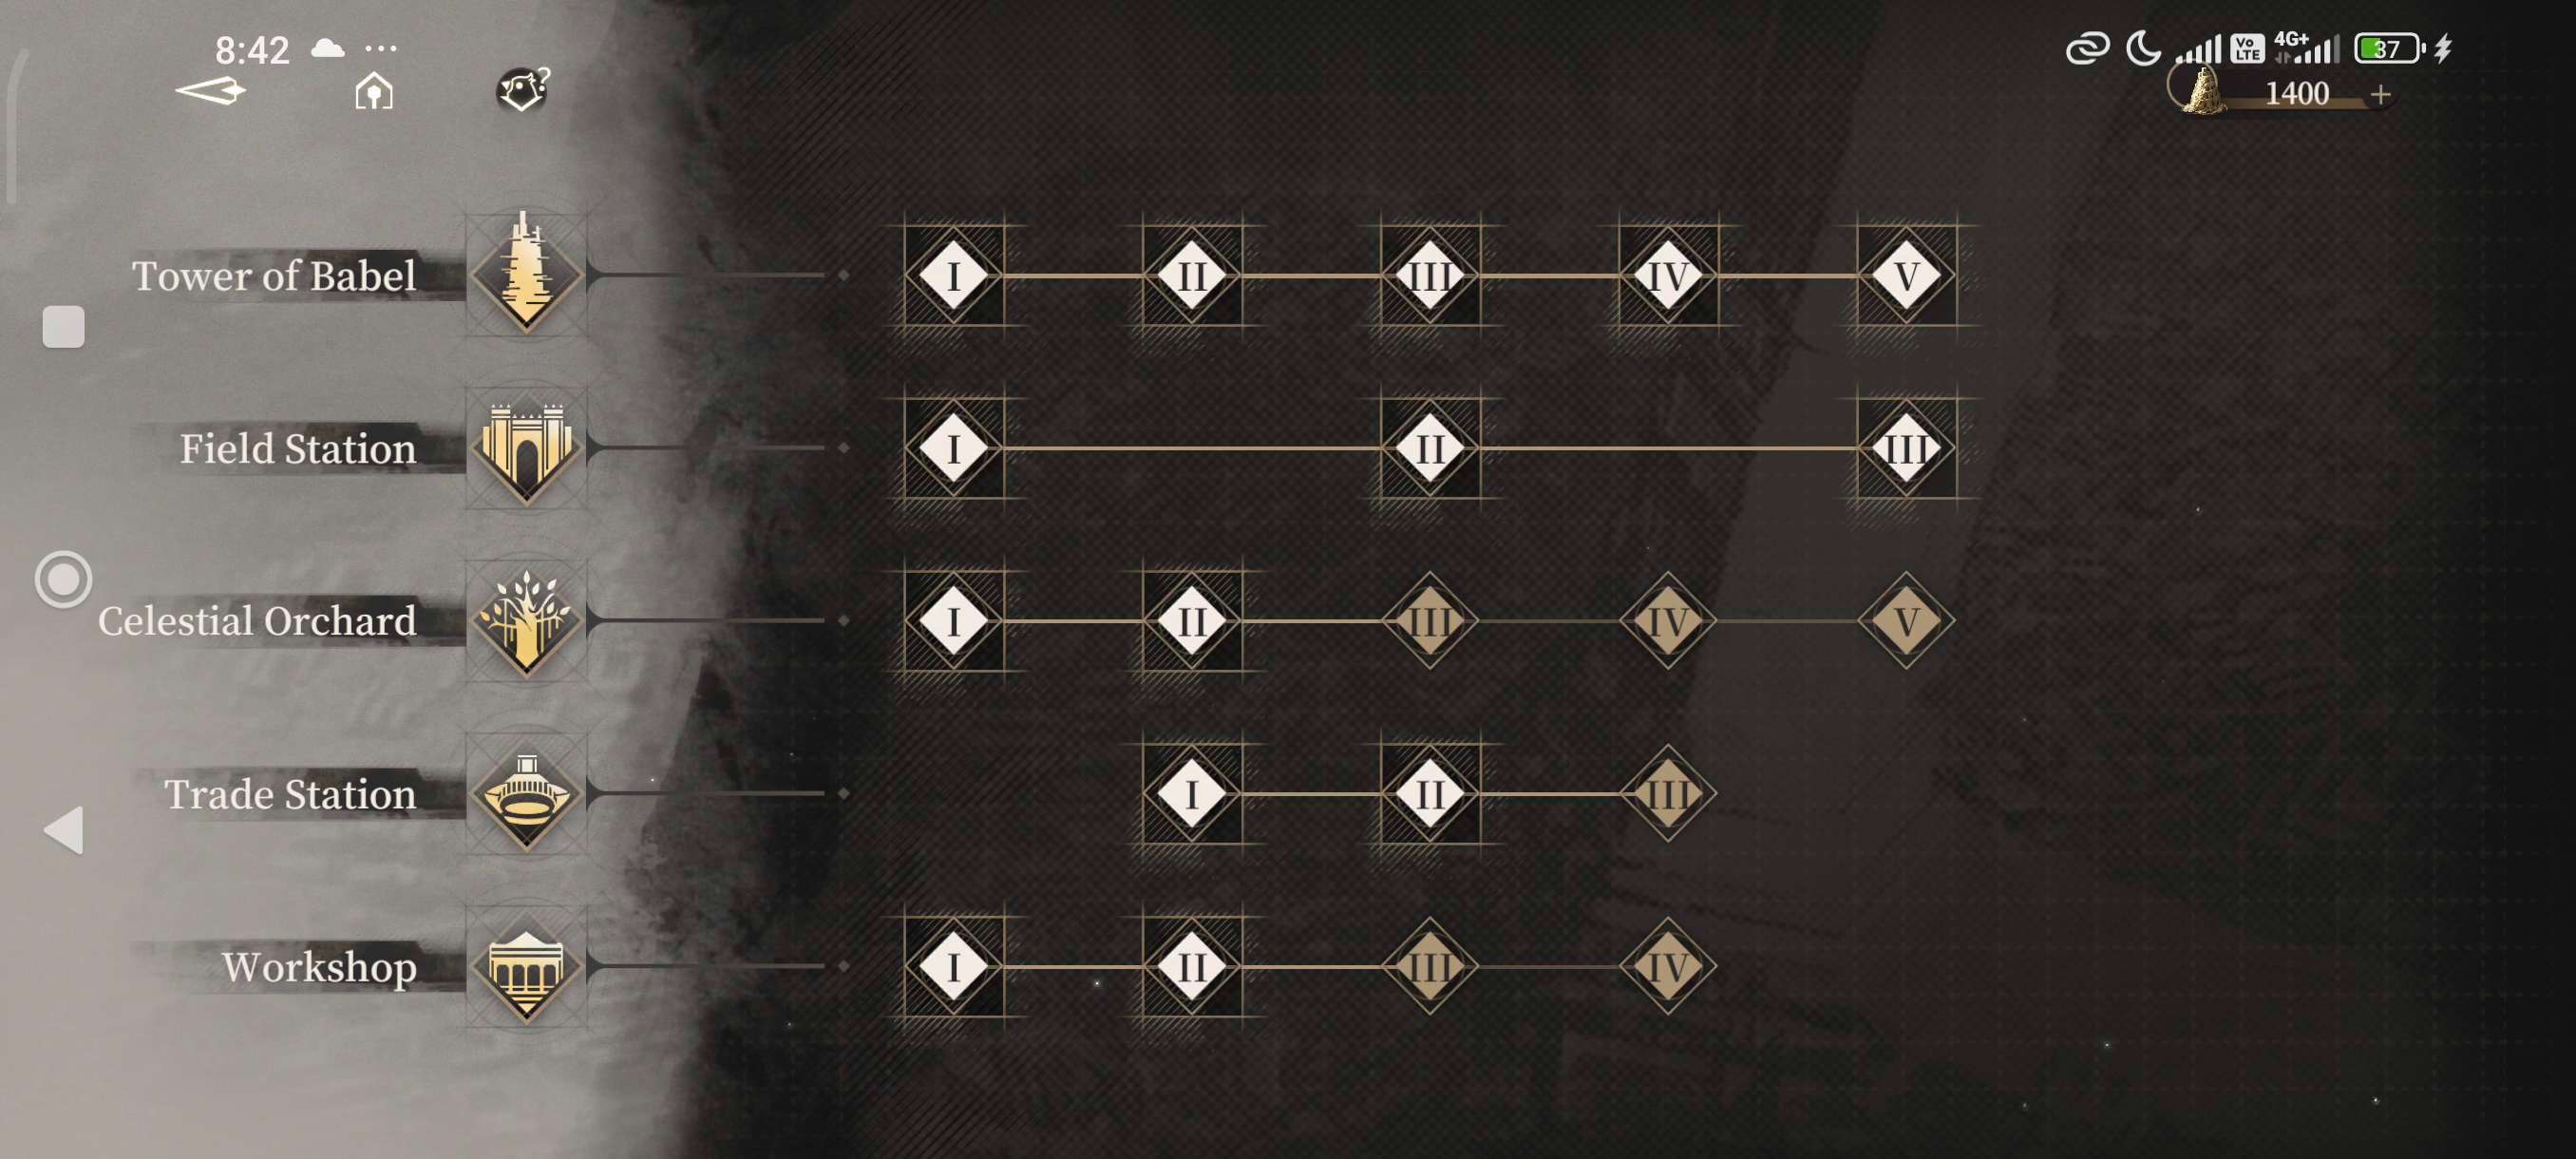
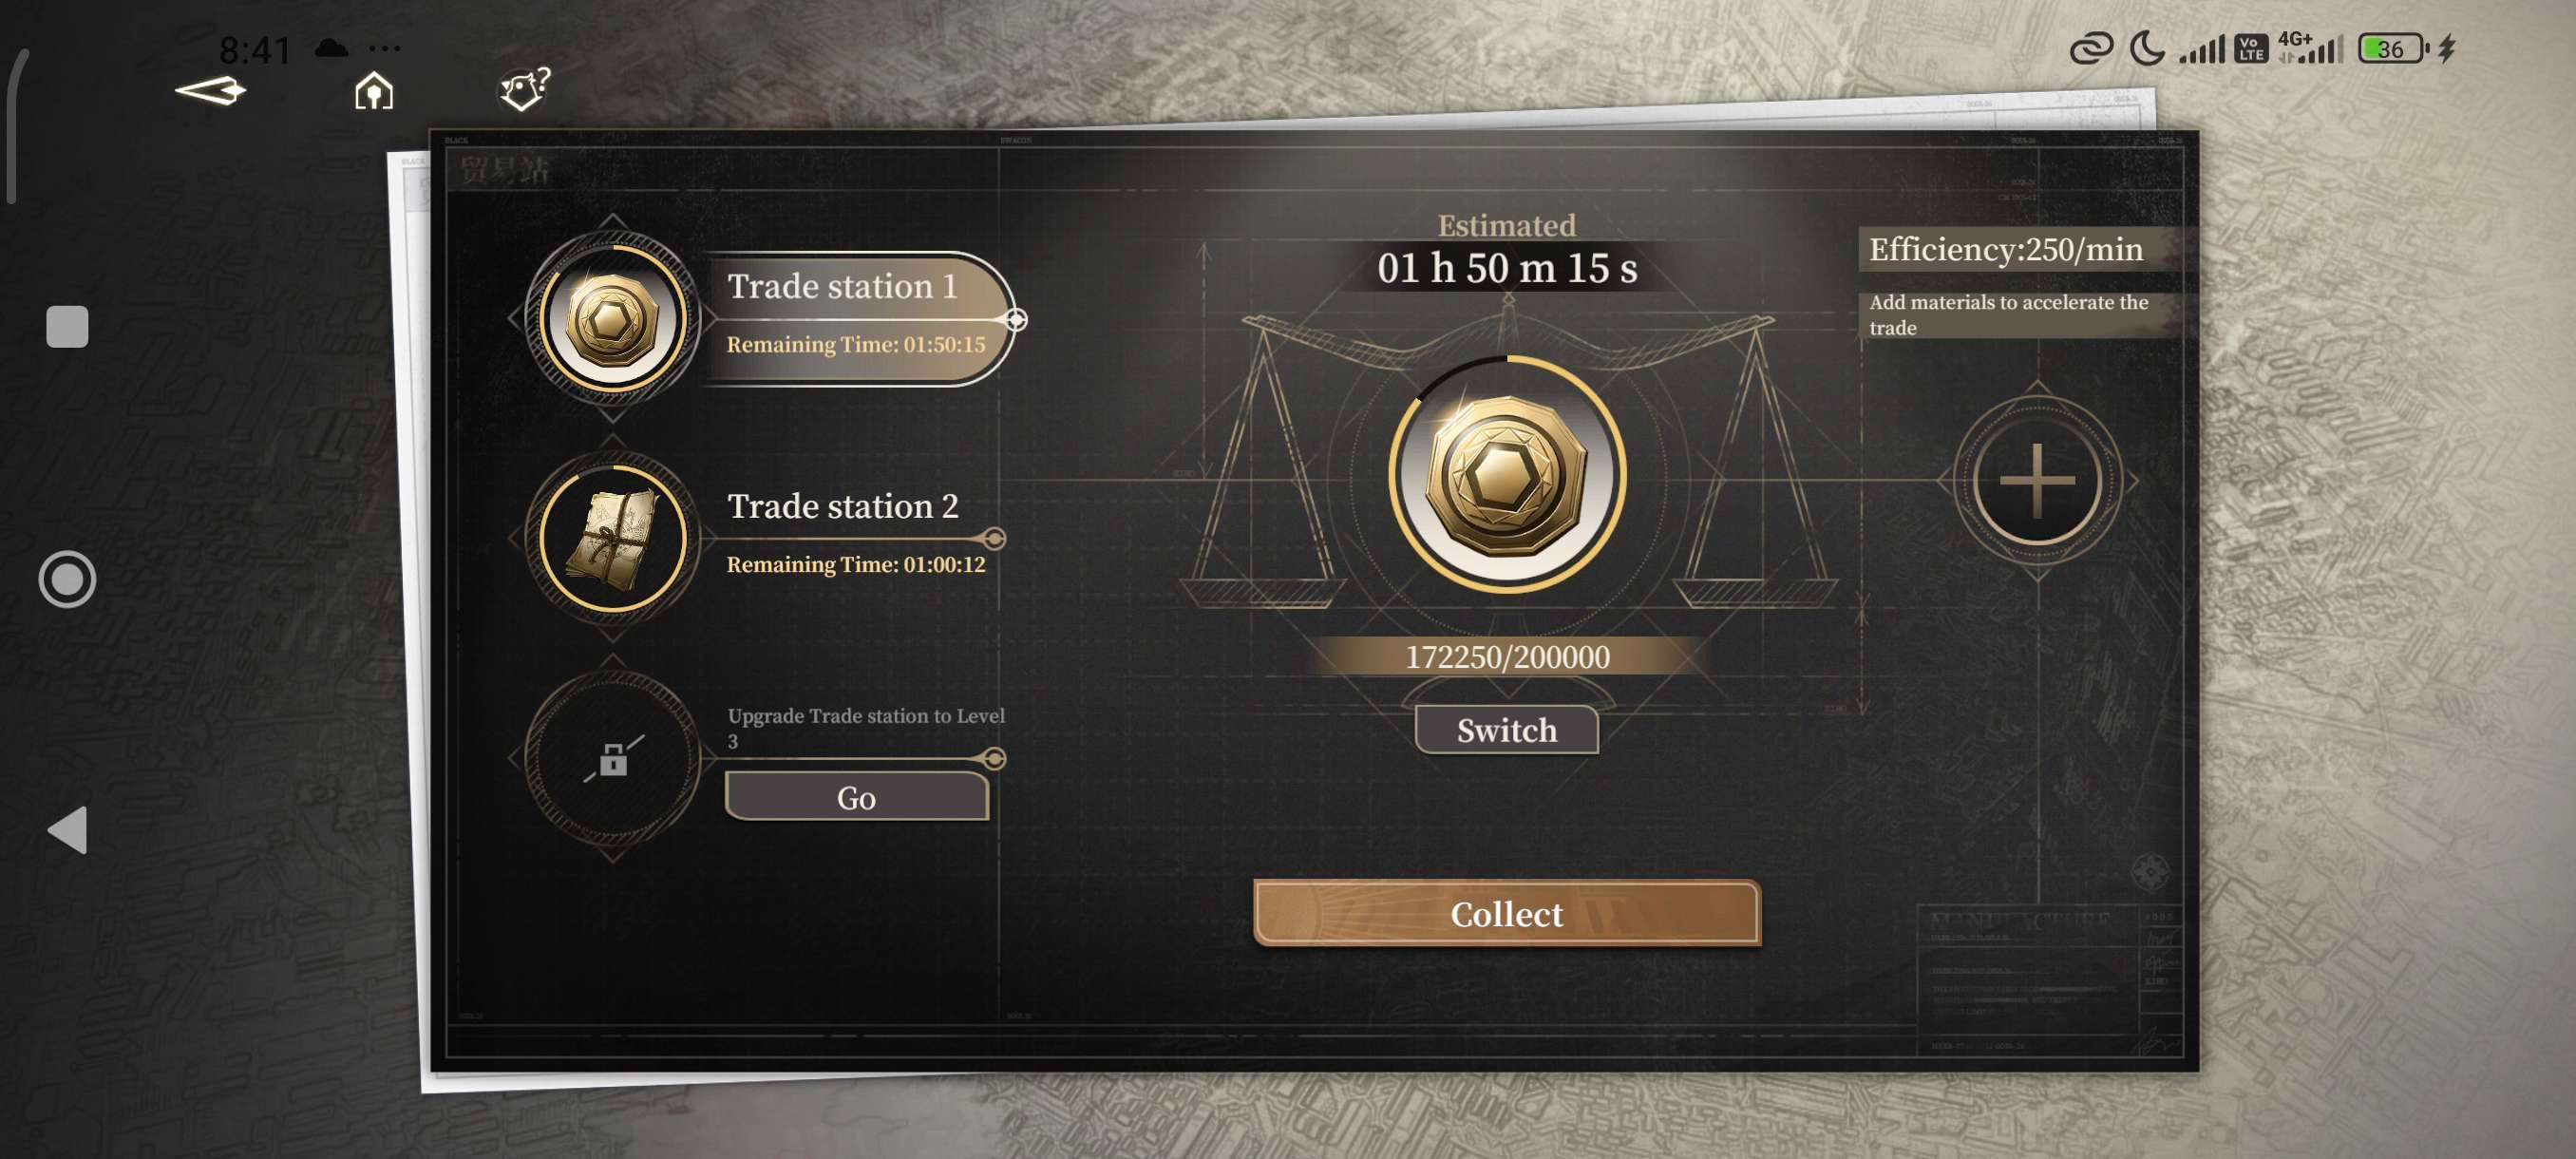
- In Babel Tower, prioritize upgrading Field Station and Trade Station because you can get Orelium (gold) and character XP book from there as well as Rune Shard (premium currency).
- This game has a mode that needs you to run multiple teams, so start building 2 of your best DPS from the start. Those modes require a big damage dealer; as for the support, if you are skilled enough, you can bring a lv 1 support unit there and still win, just don’t get hit.
Elemental Anomaly
So, this game has elemental effects that you can inflict upon enemies. Let me explain the effects of each element first.
All elements deal HP% damage with an ATK% threshold upon triggering the effect.
- Fire/Burn: It inflicts HP% damage over time and also has an ATK% threshold.
- Thunder/Electrocution: During the electrocution duration, every hit dealt to the enemy will zap them as long as the duration lasts. The damage frequency depends on how fast the character attacks the enemy or how many hits land. The zap deals HP% damage with an ATK% threshold.
- Water/Stasis: This elemental effect will freeze enemies for 3 seconds. You can freeze bosses as well.
- Light/Glare: This elemental effect will cause massive damage based on HP% (it also has an ATK% threshold, but it’s larger than other elements).
- Dark/Erosion: Erosion allows you to accumulate damage after it’s triggered, and you have a limited time to deal as much damage as you can while Erosion is active. The accumulated damage will be released as additional Dark damage. The accumulation to damage conversion rate is around 30% (tested).
- Overload: This elemental reaction causes massive damage similar to Glare, but this effect is triggered when a minimum of two elements are triggered within a short timeframe of each other (around a 5-second window).
Character Status
So we’ll skip on the basic statuses and I will talk about two only:
- Pierce: It’s straightforward ignore defense based on percentage.
- Elemental Anomaly Mastery: Okay, this status is confusing if you read it yourself. Basically, this status is the same as “Elemental Mastery” from a similar game, but the difference is that only the highest Mastery will count, and it will affect every character on the team. So, note this: don’t bring two characters that you built with high mastery because only one will take effect.
Team & Character Building
Okay about team building note some stuff from me if you will:
- All Mono Teams are bad except Dark Mono; the reason being is the nature of Erosion itself. Although for now, we don’t have a good Dark Support unit yet to afford that (Ninsar is great support, but you would want to build her as Nuke DPS instead).
- Use three different element characters or a 2:1 ratio of the same element. This is because with a minimum of two elements, you can Trigger Overload.
- Don’t use Chisel to reforge your Mark until you have at least two of the desired substats after leveling your Mark to Lv3.
- Know your character’s Main Stat. While all damage-related stats need Attack, some units depend on other stats for their effects.
- Buy the Battle Pass if you can, because it gives a lot of Golden Chisels. While you can farm them, the amount you get is not much.
- Farming Exp Books is not necessary if you have a maxed Trade Station (or high enough), because it gives thousands of Lv 1 Exp Books every day.
Team Recommendation
So, I already have route planned for which team I will build specifically to tackle all of the release contents like ToF, Multiverse etc.
First Team
- Li Chi / Azi / Logos
Li Chi will use Double Tower Mark 1 & 2 as its main Mark effect. Azi will use Blazing Fire 1, and Logos will use Blazing Fire 2.
Why this team?
As you might know, Li Chi loses HP whenever they use Skill 2. The lower their HP, the higher the cooldown for their Skill 2 will be, which will slow down your DPS since you won’t be able to enter Fallen State quickly. Logos’ Notes here trigger for every hit dealt by Li Chi, and it will damage the enemy and heal Li Chi enough for them to have an infinite rotation to enter Fallen State. Azi serves as a super support, which will debuff Thunder Damage reduction and give more Attack to the team. Make sure to build Azi with high Anomaly Mastery.
For Mark substats, Li Chi will need ATK, Crit DMG (or Pierce), and Thunder Damage; Logos needs ATK, Light DMG, and Crit Rate; and Azi needs Anomaly Mastery, ATK, and Thunder Damage.
It would be better if you have Azi’s Weapon.
Second Team
- Florence / Ming / Zero (or replace Ming with Hephae)
Florence will use Double Tower Mark 1 & 3 as its main Mark effect. Ming will use Dragon 2, and Zero will use Blazing Fire 1.
Why this team?
With this Mark setup, Florence can gain high Pierce, which complements their Weapon. Ensure they have enough Pierce (it’s possible to reach 100%) and Crit Rate if you are free-to-play (F2P). If you have P6 Florence, the situation will be different. Zero here will be a buffer that gives an Attack buff from the Mark and their skill kit, and extra Crit Rate from their Talent. Ming provides a Damage Link and Fire Resistance reduction to the enemy, making Florence deal significantly more damage. Ming also provides more defensive options for Florence in case you have poor dodge. Although, I would say Hephae has a better weapon than Ming, honestly.